"Hello World" Step-by-step
Introduction.
This is a step by step tutorial for understanding StateGo.
Hello World.
So, you will create a new state machine for displaying "Hello World".
Preparation.
First, see "Create a new state-machine and execute the sample" tutorial to check Unity environment and StateGo's initial condtion.
Reset a flow.
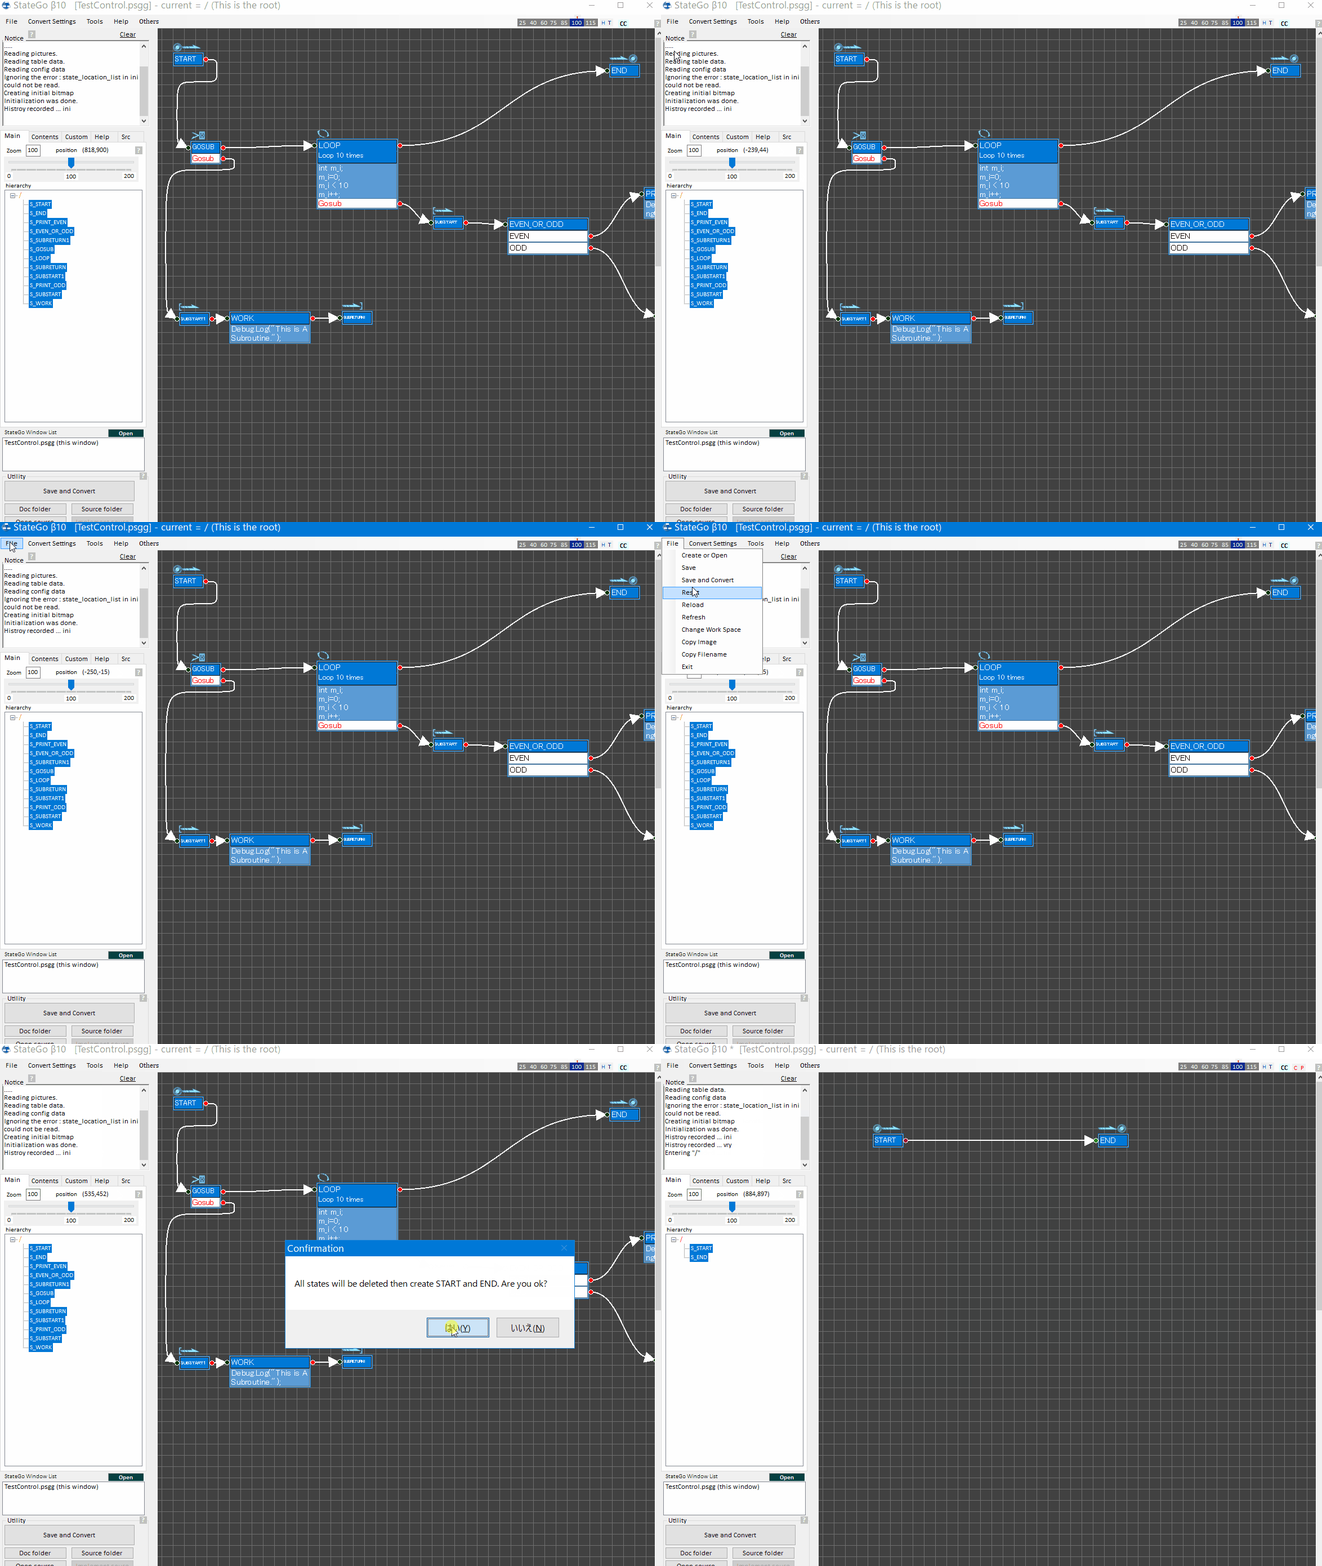
Open StateGo with "TestControl.psgg".
For starting empty condition, click "Reset" on the Menu Bar's File Menu. It causes "START" and "END" exist only in the flow.
Create a state.
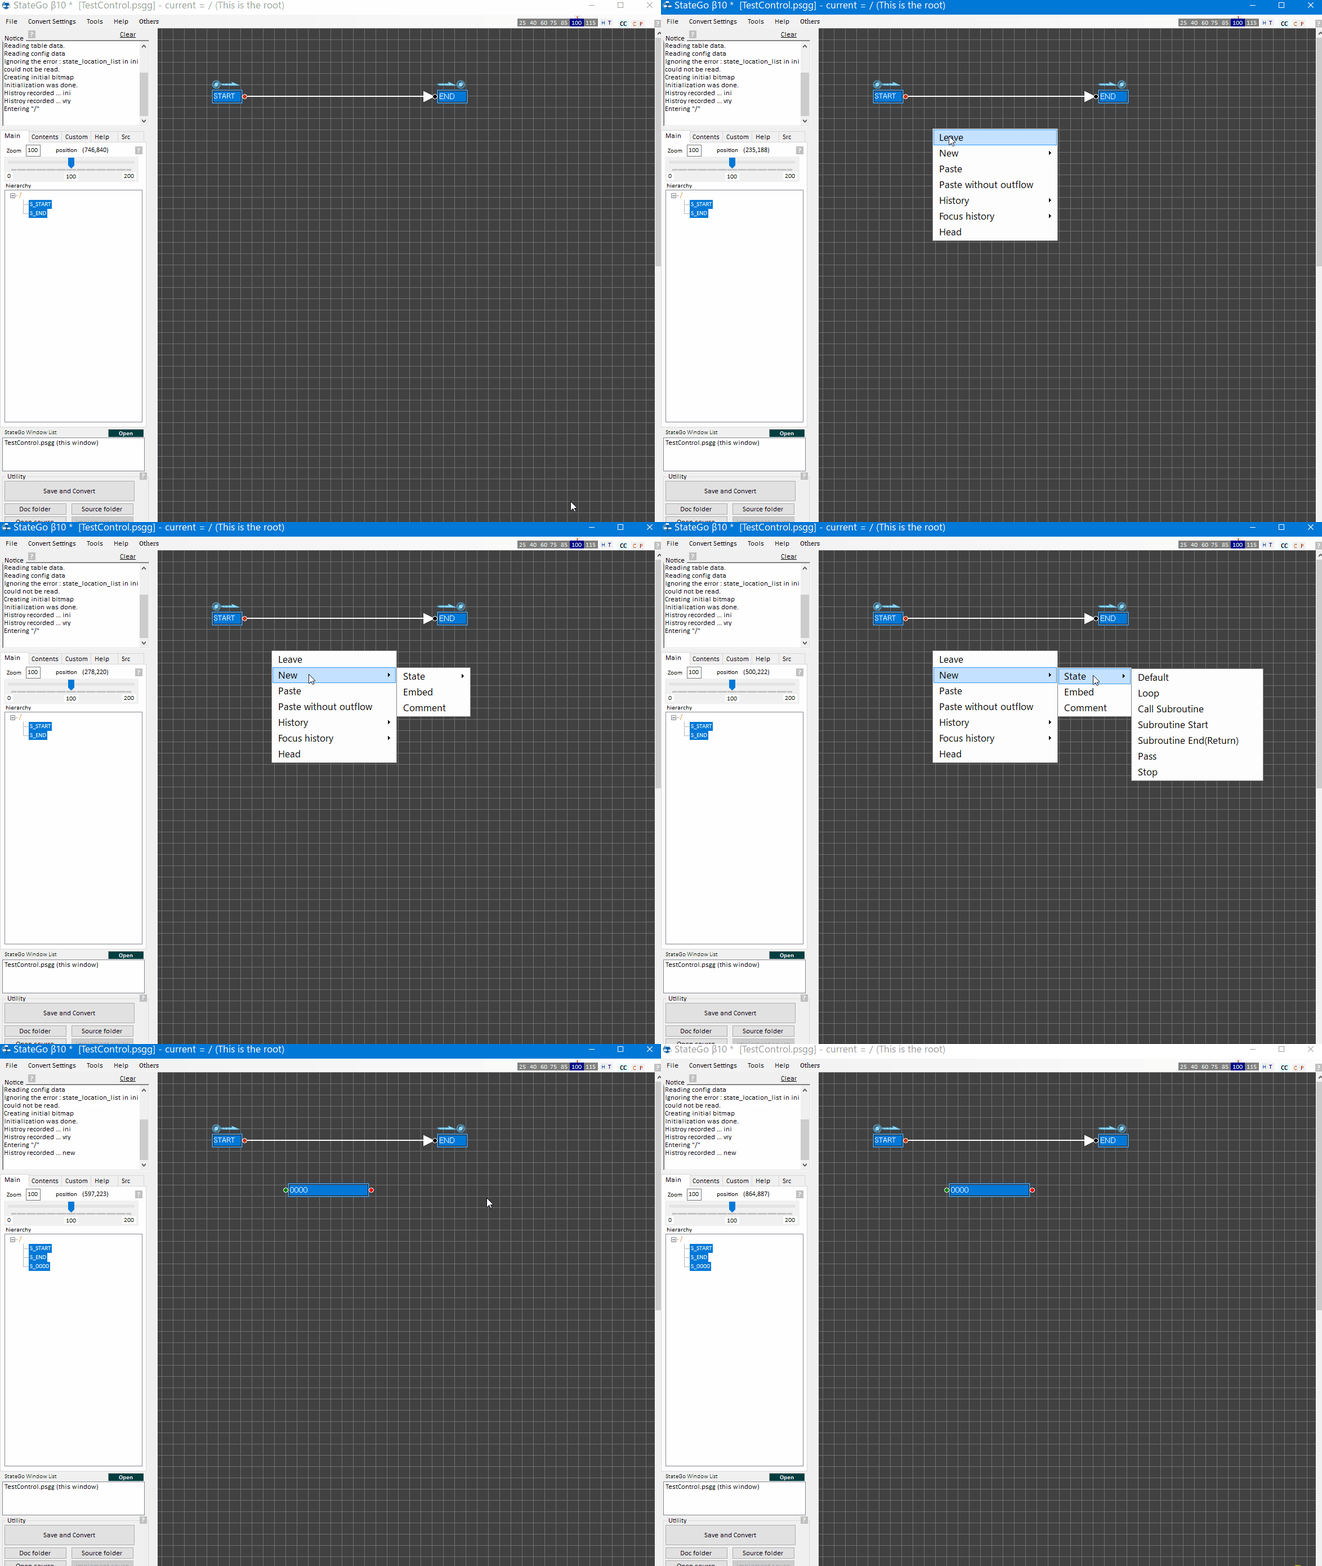
Click on the blank space between "START" state and "END" state to display the blank context menu.
Slelect "New" -> "State" -> "Default".
It causes a state created.
Define the new state's name and writing a comment.
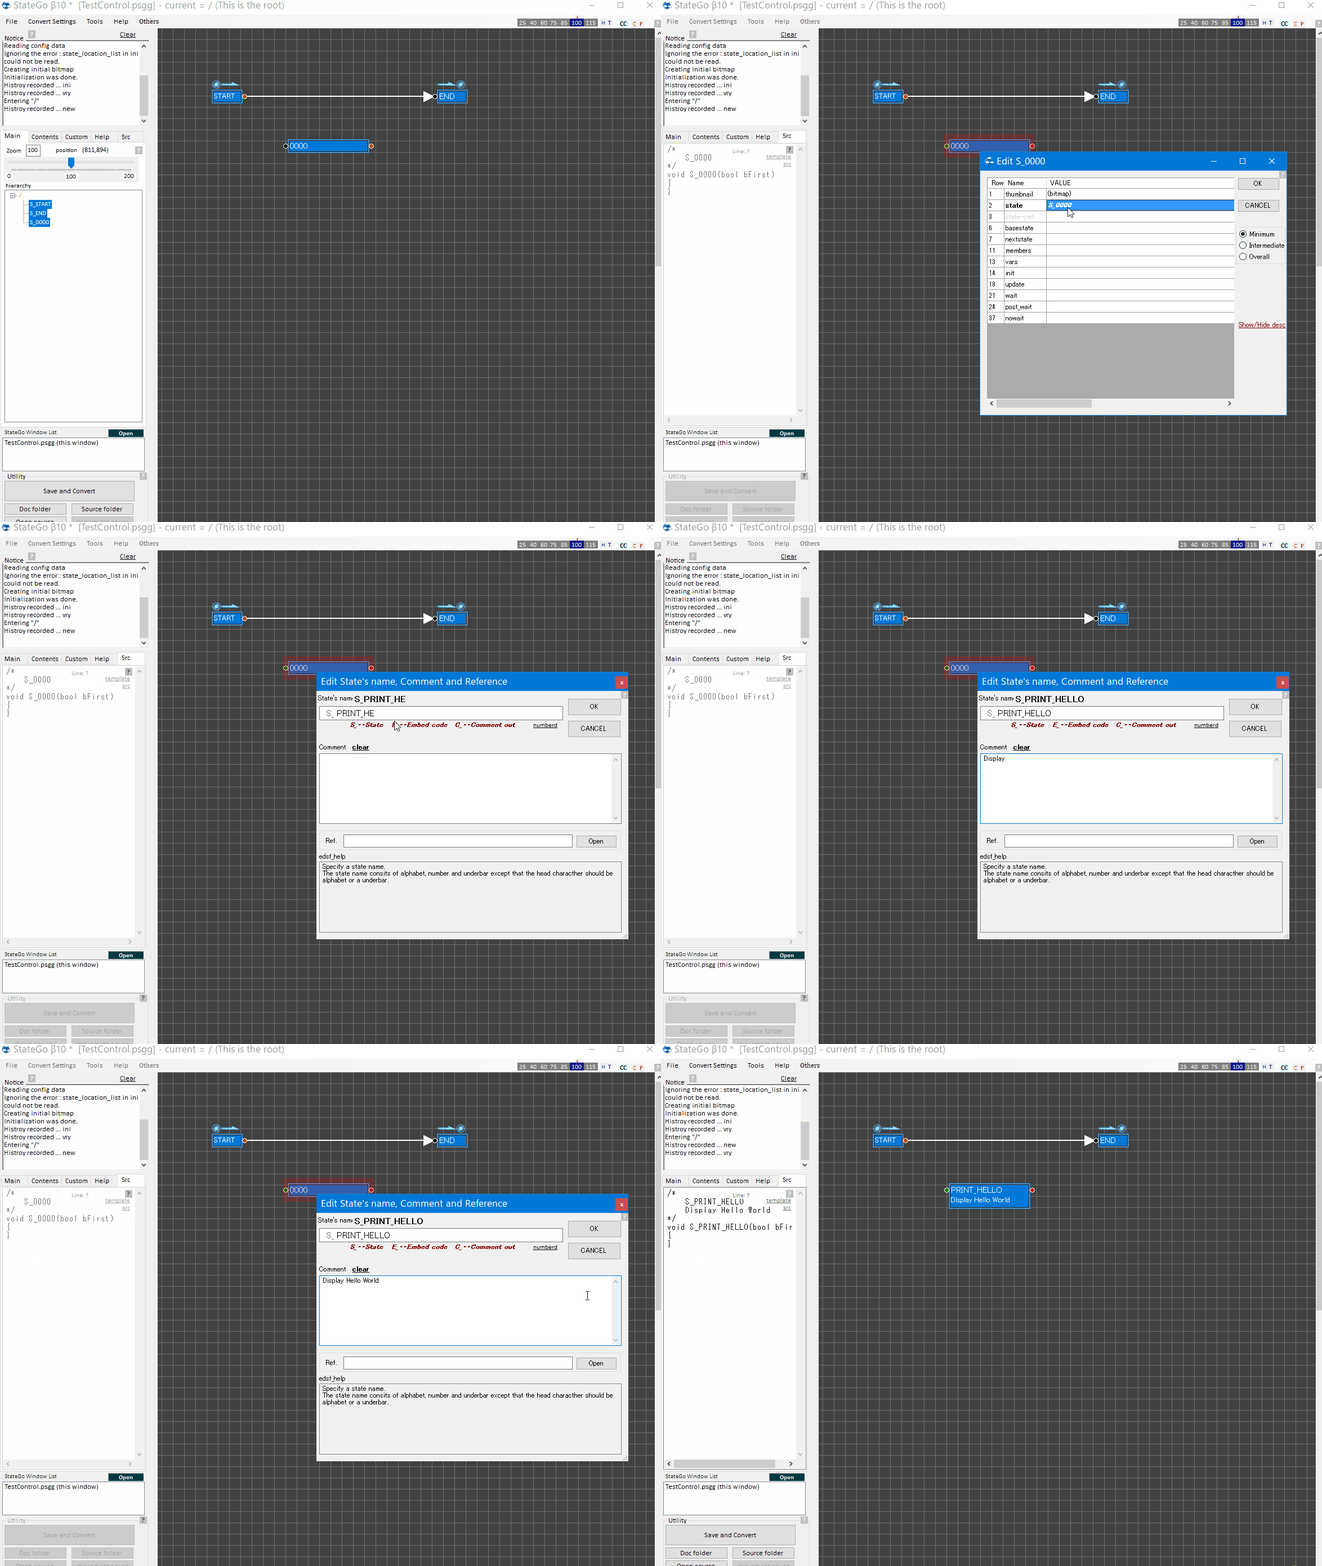
Click on the state to display the state context menu.
Select "Edit items".
It causes the item table displayed.
For inputting state's name, click "name" at the 2nd row.
Set "PRINT_HELLO" for th state and set "Display Hello World " for the comment.
Input program code.
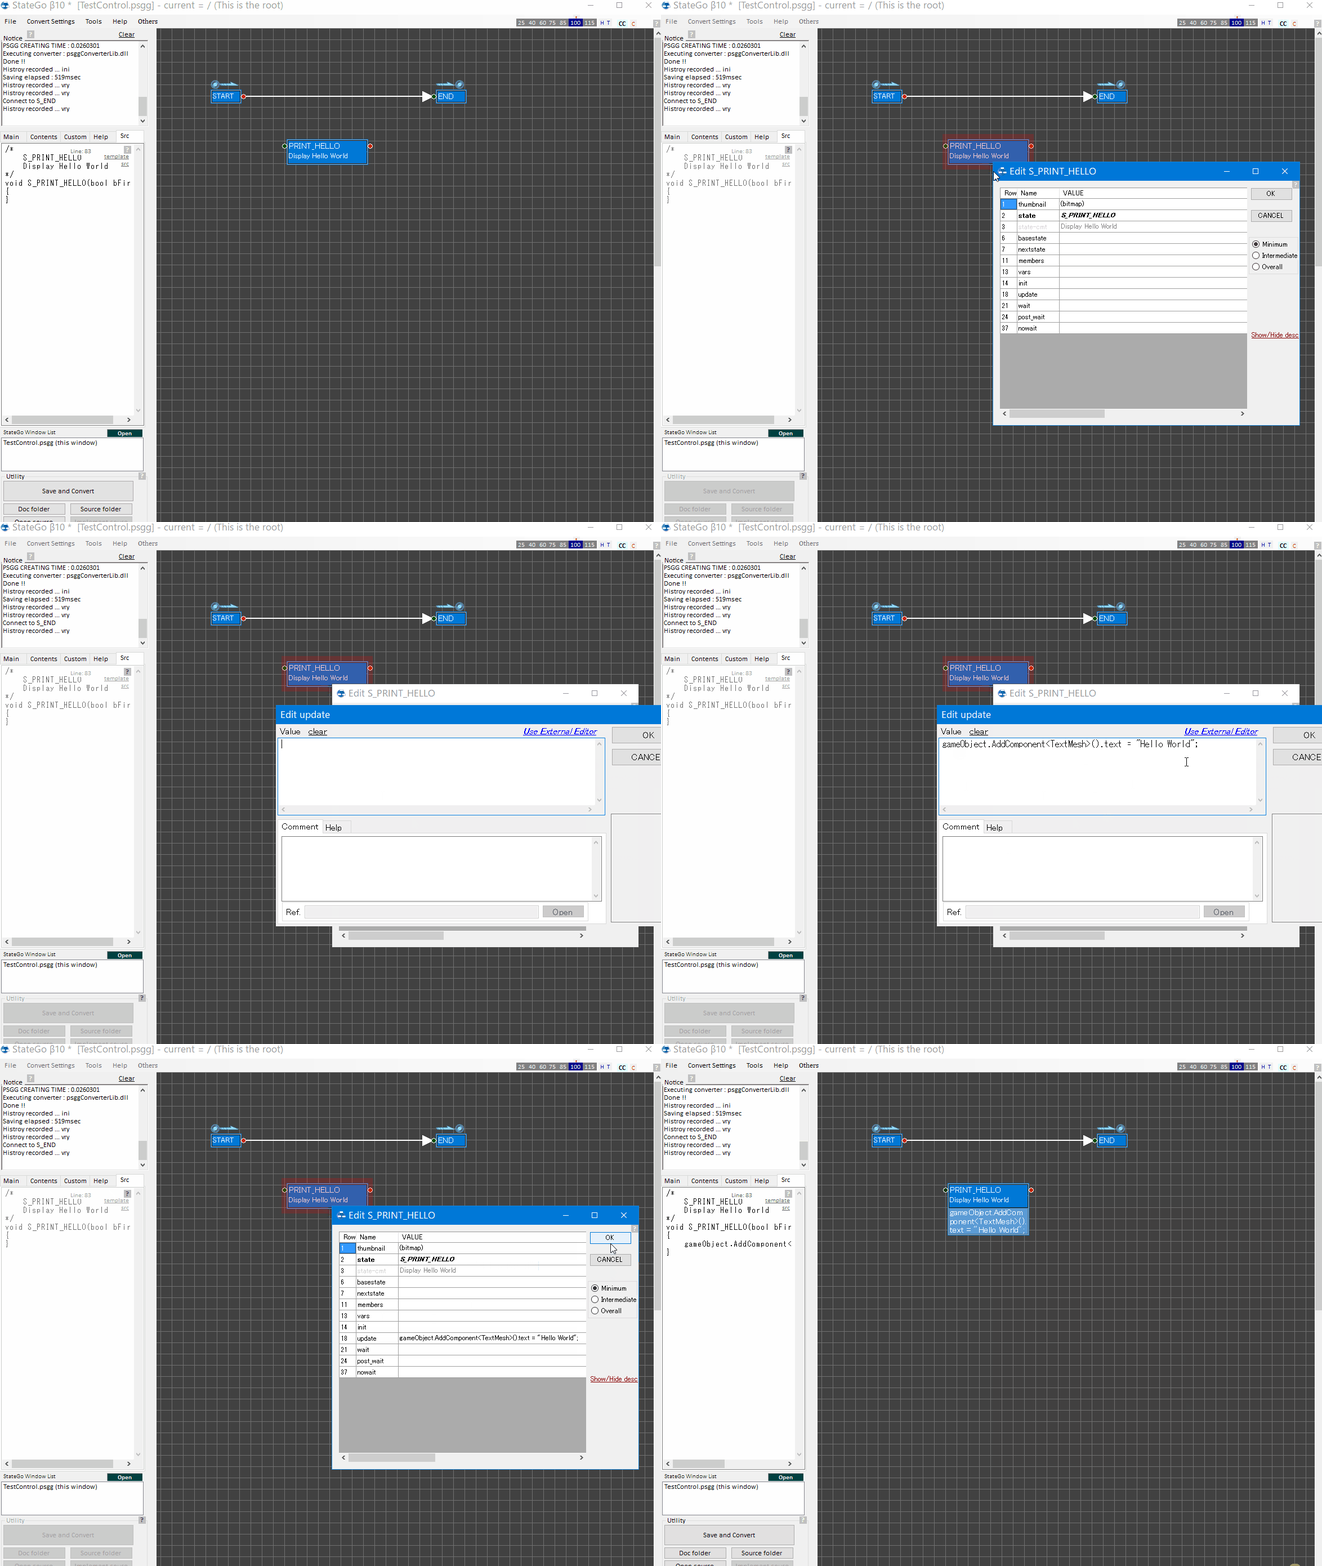
Put program code in the "update" item.
"update" item means calling by updating. However, only one time executes because "nextstate" is defined.
gameObject.AddComponent
Edit arrows.
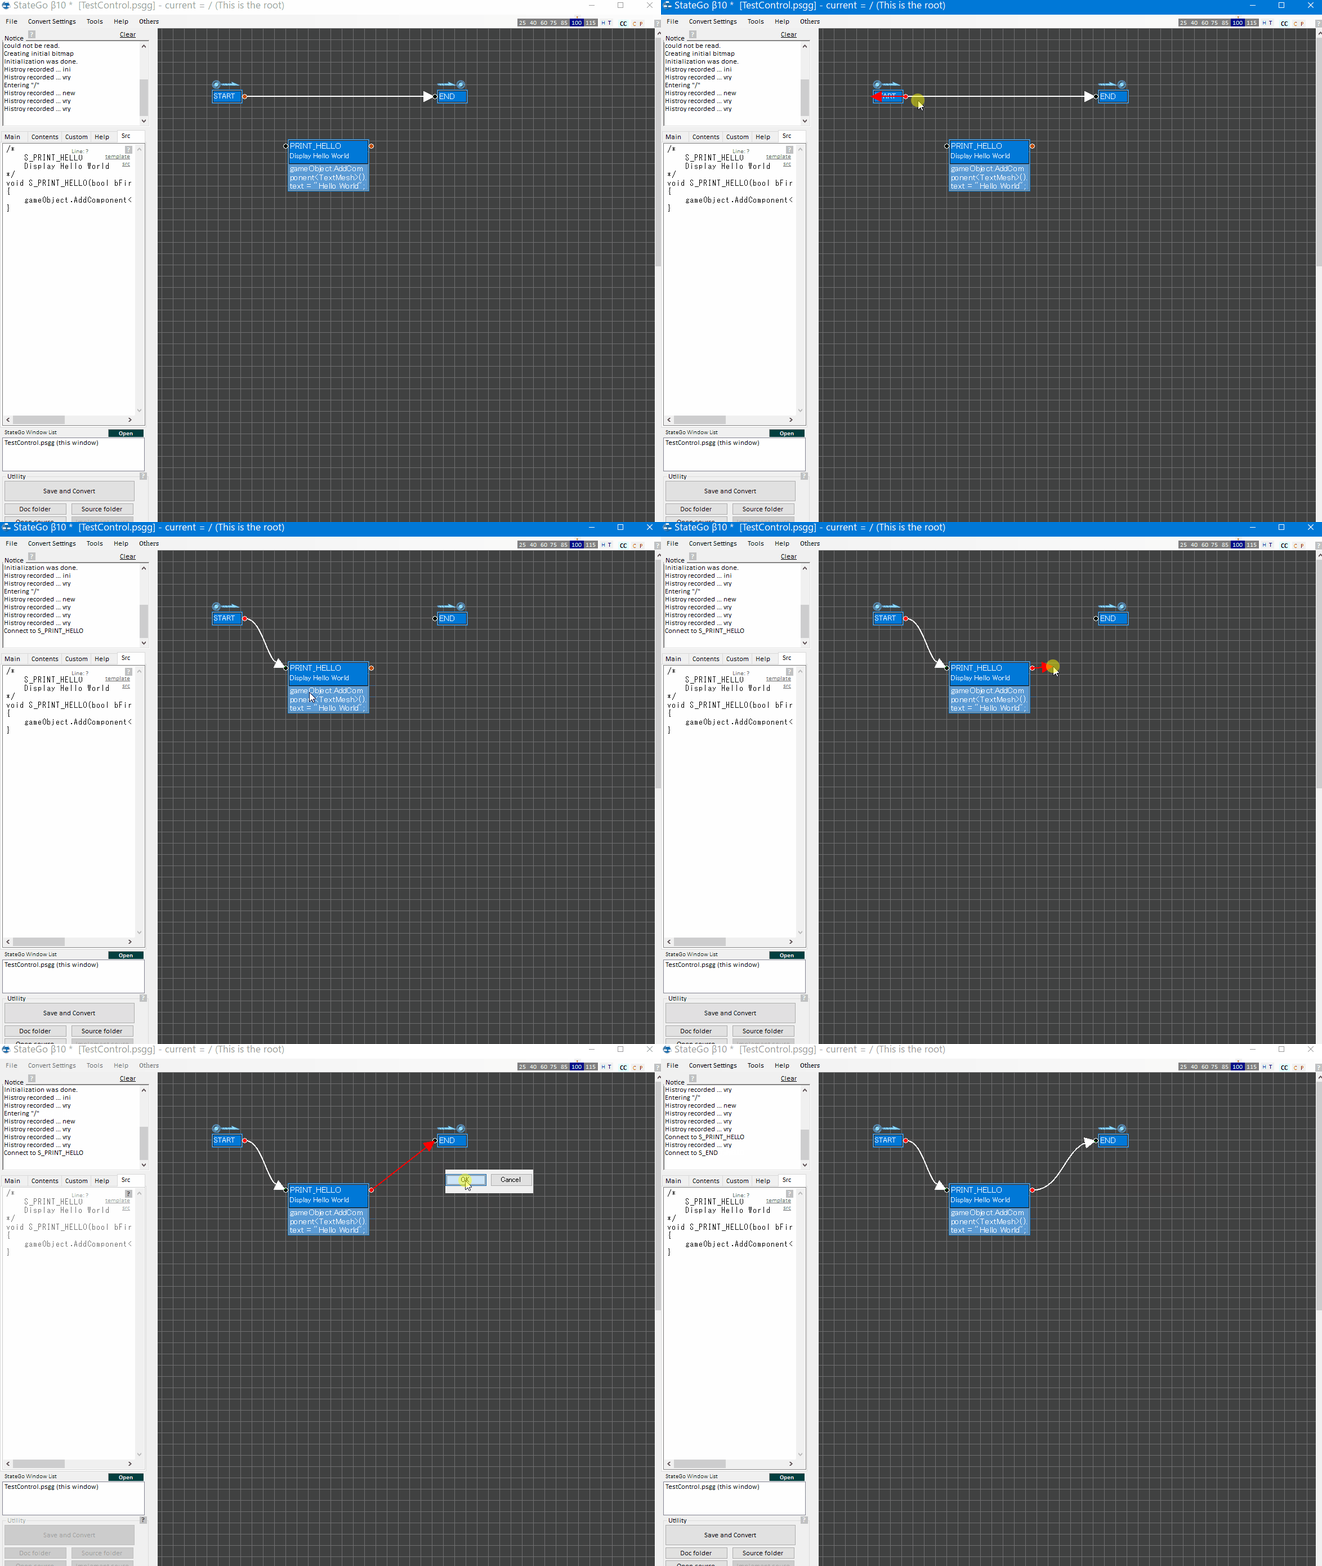
Drag the red red circle of "START" state's right then you will see an streight red arrow and drop it on the green circle of the "PRINT_HELLO" state''s left.
Confirmation of program code
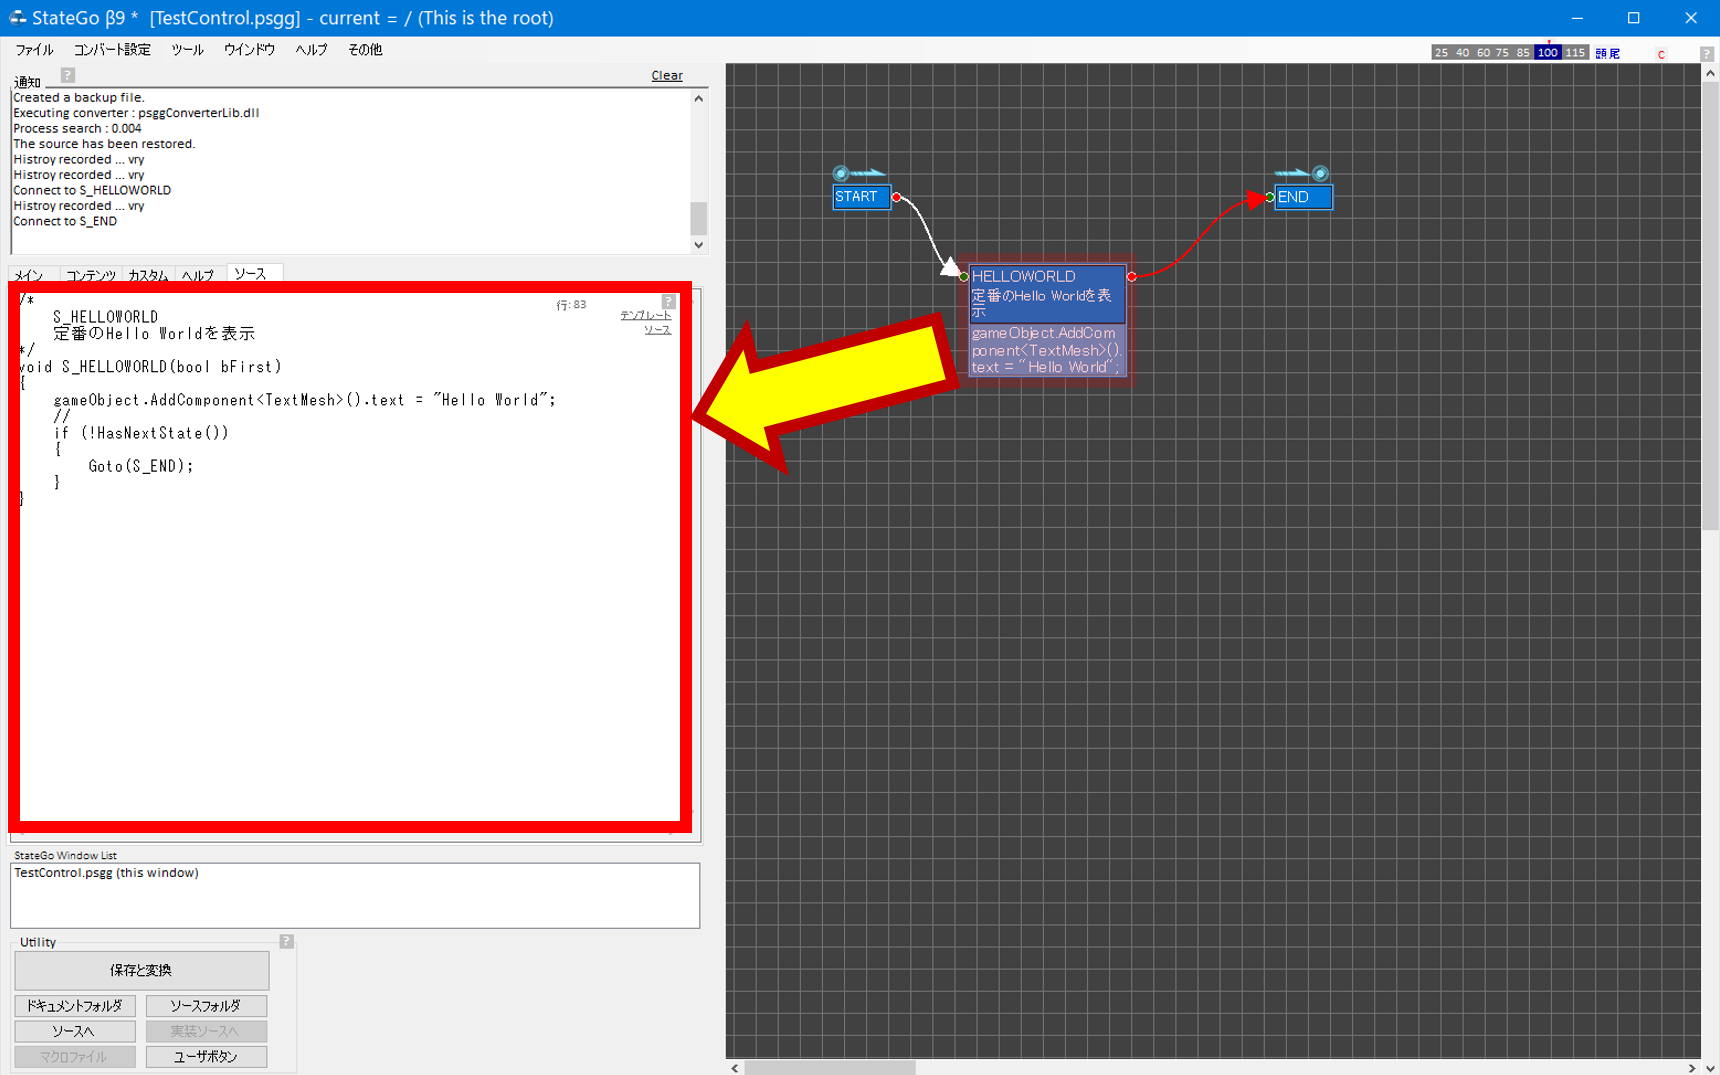
Clicking "PRINT_HELLO" state causes its converion program come out on the source panel of the window's left.
Clicking "START" and "END" causes the same.
Convert
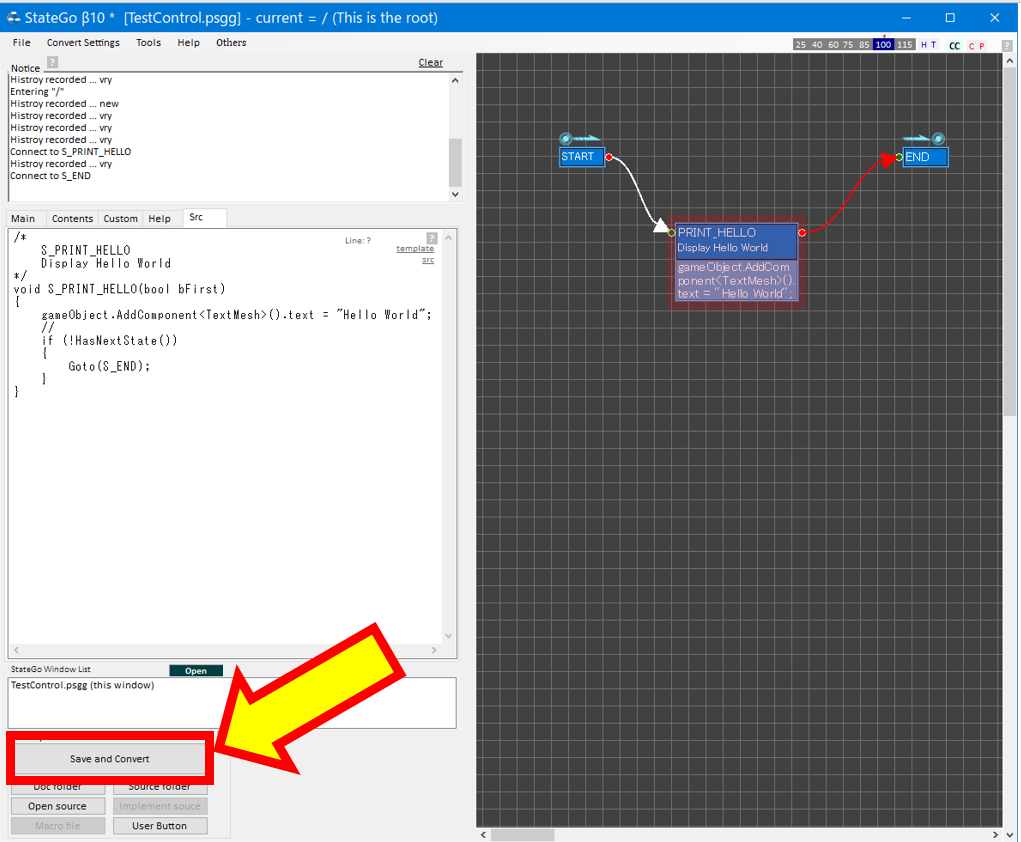
Pushing "Save and Convert" button on the window's bottom left.causes to put the conversion program code into "TestControl.cs".
Execute
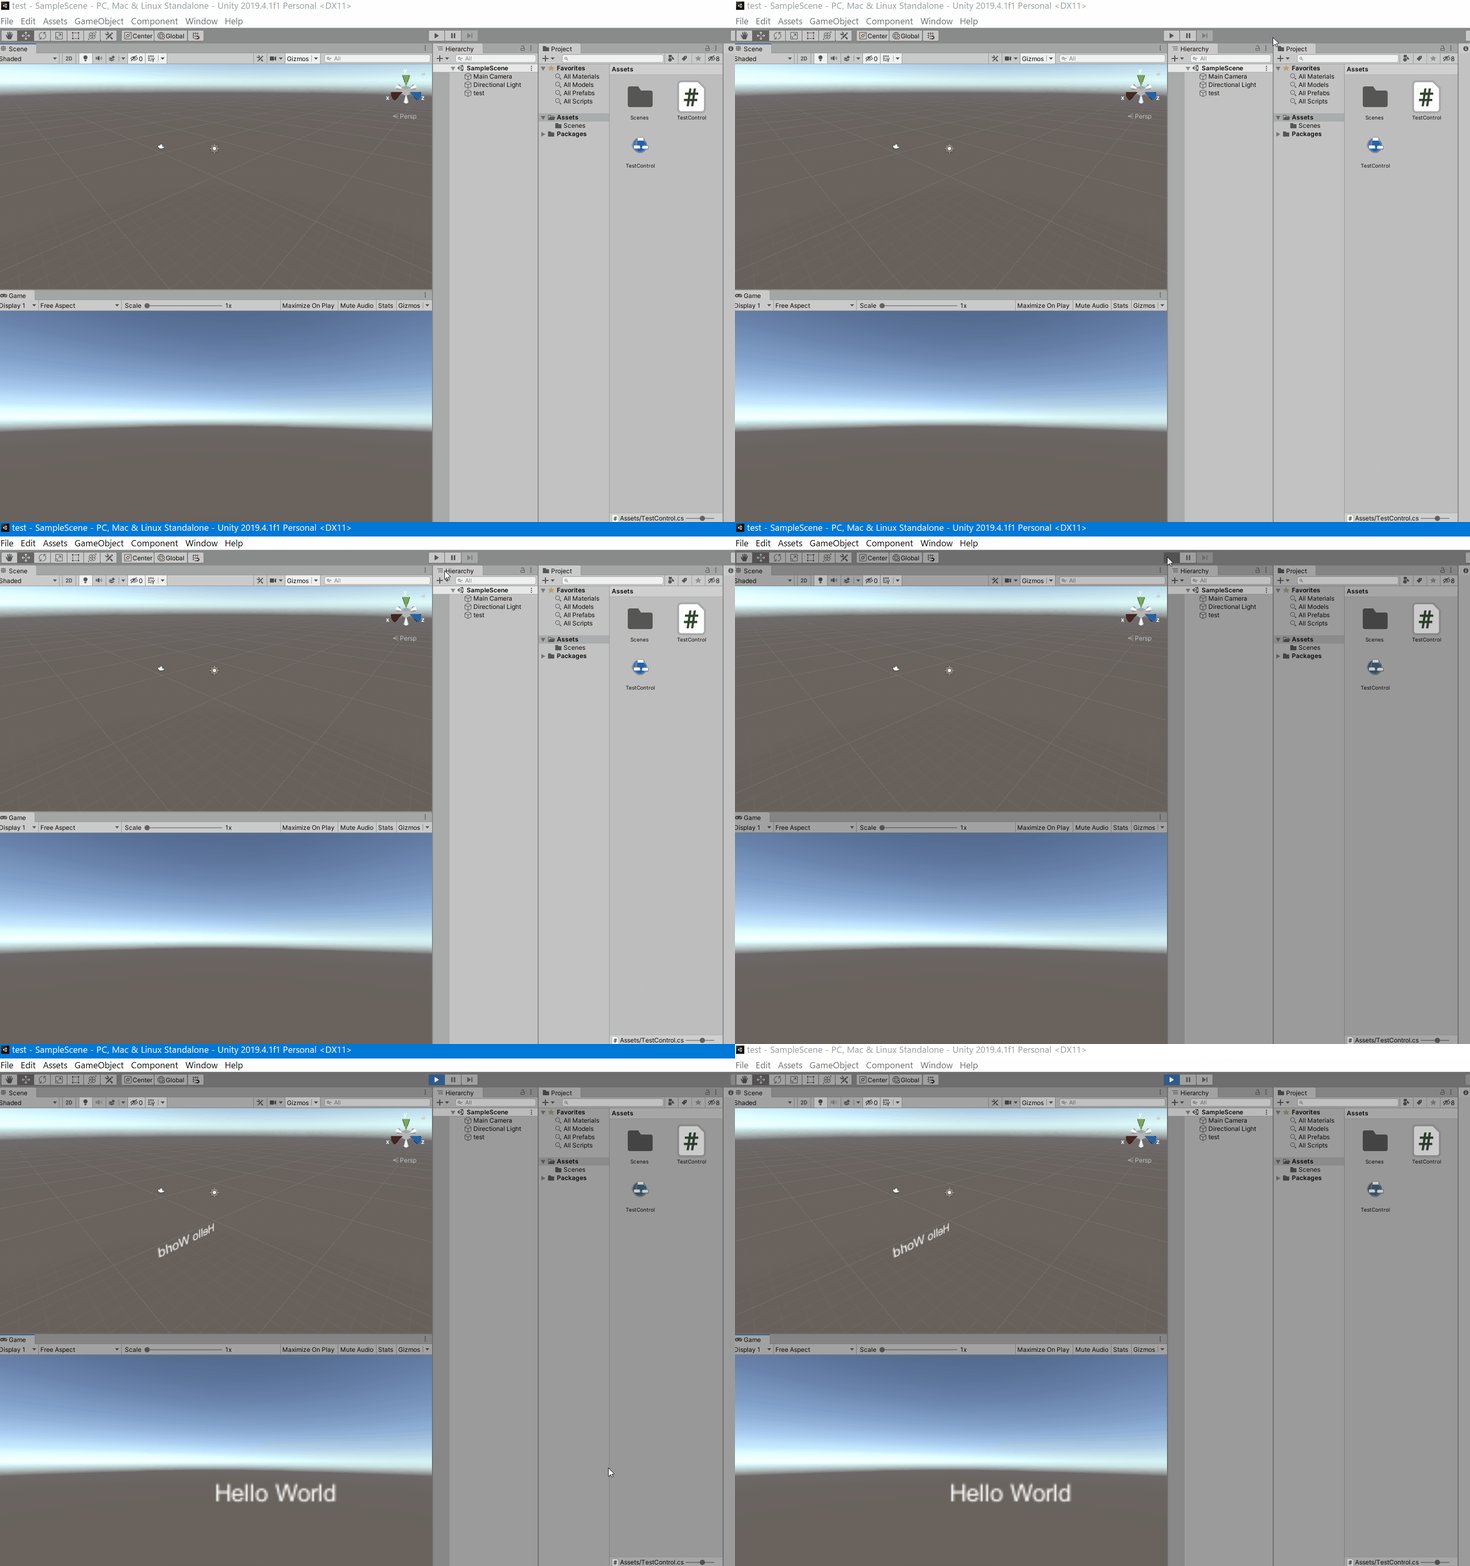
Push "Play" button on Unity.
What you learned.
The followings are you learned.
- Creating a new state.
- Defining the state's name and put comment into it.
- Inputting program code.
- Editing arrows.
- Converting.
- Executing.
That's all.

